
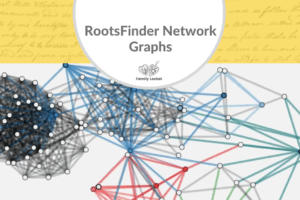
Today’s episode of Research Like a Pro is how to use RootsFinder, a family tree building online tool, to analyze your DNA matches and create a network graph – this time, with MyHeritage DNA matches. MyHeritage is unique because it shows you which of the shared matches triangulate. Network graphs consist of DNA matches, the nodes, and shared match connections, the lines between the nodes. With MyHeritage matches, you can create two types of network graphs at RootsFinder – a shared matches network graph, or a triangulation network graph. Join us as we discuss both of these.
Transcript
Nicole (2s):
This is Research Like a Pro episode 181 RootsFinder Triangulation Network Graphs with MyHeritage. Welcome to Research Like a Pro a Genealogy Podcast about taking your research to the next level, hosted by Nicole Dyer and Diana Elder accredited genealogy professional. Diana and Nicole are the mother-daughter team at FamilyLocket.com and the creators of the Amazon bestselling book, The Research Like a Pro a Genealogists Guide. I’m Nicole co-host of the podcast join Diana and me as we discuss how to stay organized, make progress in our research and solve difficult cases.
Nicole (42s):
Let’s go. Hi everyone. Welcome to Research Like a Pro. I hope you guys had a great holiday.
Diana (52s):
Hi, Nicole. How are you doing today?
Nicole (55s):
I’m doing well. I’ve just been working a lot on my RootsFinder network graph. I’m excited to share about that today. What about you?
Diana (1m 2s):
Well, I’ve been reading the latest issue of the NGS magazine. This is part of being a member of the National Genealogical Society. You get a magazine that comes out and they always have a theme. And the theme for this quarter, I can’t remember exactly what the date on it is, is the census. So all the articles were centered on the federal census for the United States and so many good articles. The one I read this morning was by Jill Crandall. She’s an accredited genealogists and one of our colleagues and friends, and she wrote a great article about searching the census. We all have that research where we cannot find a family in the census and it drives us crazy.
Diana (1m 47s):
And her whole article is about search tips. Some really interesting things. A lot of the things that I use all the time, like searching just by an unusual first name in the family, or maybe just searching just by all of the men of a certain age and a county, you know, some things like that. But one of the things that stuck out was she talked about going back to the old soundex and how, you know, you used to have to search before we had these nice indexes. So maybe we’ll have to do a podcast or something about soundex and how the coding works for that. But basically it’s like, say for instance, my Royston ancestors, if I was searching for Royston and the name was actually index as Boyston, you know, they thought the R was a, B none of those results would come up with the B.
Diana (2m 35s):
So you have to be aware of some of the alternate letters you need to put in to make sure you are getting hits. So, anyway, it was a great article and the whole magazine was super fun. One of the articles was on getting ready for the 1950 census, which has coming out 2022 in April. That’s super exciting and fun to think of. We’ll have a new to look at. So anyway, if you’re not a member of the national genealogy society, you might want to consider you get the quarterly, which we talk about studying case studies, and you get the magazine that gives you all sorts of research tips. I think you get a discount on their publications in the store.
Diana (3m 17s):
Don’t quote me, but it is a great group to be part of, and it’s good to support their work.
Nicole (3m 22s):
Absolutely. I do think you get a discount on their publications.
Diana (3m 26s):
Okay. Well, I thought maybe you did. I just couldn’t quite remember. Well, our announcements for 2022, here we are. We’ve got two study groups. We’ve got our spring group beginning, February 16th, and our early bird sale does end mid January. So if you’re interested in signing up, be sure you do that before the early bird sale ends and our fall study group will begin in September for our traditional Research Like a Pro. We have our holiday sell on online courses ending soon. So make sure you’ve joined our newsletter to get the coupon code for that. And if you’re interested in being a peer group leader for one of our study groups, go check out the application and see what the prerequisites are.
Diana (4m 12s):
See if you can start getting ready to apply for that. And one of our future groups.
Nicole (4m 16s):
Yay. Well, today we’re talking about roots finder network graphs, and we talked about this in the last podcast episode, where we made a RootsFinder network graph with Ancestry DNA matches. And then today we’re talking about making a network graph at RootsFinder with MyHeritage matches. And this is perfect for RootsFinder because I believe the RootsFinder network graph was kind of based on this idea of triangulation, which is a unique feature at MyHeritage. RootsFinder calls, their network graph view, the triangulation or cluster view. So it really was meant for using triangulation data from GEDMatch or from MyHeritage.
Nicole (4m 55s):
So let’s talk about how to do these network graphs with MyHeritage. Now, one thing that you’ll need to know is that there’s two types of network graphs you can make with MyHeritage information. And that’s because not only does MyHeritage show, you shared matches, but they also show triangulation, which is like a subset of the shared matches. You know, when you’re looking at your shared match list, do you see on the right hand side at MyHeritage that some of them have the triangulation icon. So if you do want to try it out, making both of these types of network graphs, you’ll have to create two separate profiles, that RootsFinder for the same match list.
Nicole (5m 37s):
It’s not very hard, but it is interesting to kind of see the differences. The triangulation network graph is smaller as far as it has less matches, and it’s a little less messy and it can be a little easier to work with. So I like both of them.
Diana (5m 52s):
That’s really interesting that you can do two different types of graphs in when we were talking time about the Ancestry network graphs at RootsFinder, I was a little confused about why they call them triangulation graphs, because you can’t triangulate on Ancestry, but that makes sense that if you’ve downloaded your matches, put them onGEDMatch and you triangulate there that that’s how you could use it. And then of course, with MyHeritage, they have the triangulation feature. So that’s great. A really good reason to make sure your DNA is on MyHeritage.
Nicole (6m 24s):
Yeah. I love MyHeritage. Well, let’s talk a little bit about what RootsFinder is. Again, it’s owned by Find My Past. It’s a family tree building website, and they also have DNA analysis and you can kind of combine the two, the premium level for $5 a month has a DNA feature called the triangulation or cluster view, which allows you to view your matches and clusters. Otherwise known as a network graph and in a network graph, the nodes are DNA matches and the connecting lines are shared match connections. So if you’re going to try using RootsFinder, I really suggest you join their Facebook group. They have a RootsFinder DNA tools group that you might want to join.
Nicole (7m 5s):
So to use these DNA tools, at RootsFinder you need to have a tree there and you can do this pretty easily by just importing a GEDCom file. Like we talked about last time. And so the person whose DNA kit you are using should be included in that tree, because you’re going to have to select their name from a list when you add that person’s DNA matches.
Diana (7m 24s):
So if you’ve already uploaded your tree to RootsFinder and you’ve used it for Ancestry matches, you can use the same tree for MyHeritage matches. Correct?
Nicole (7m 32s):
Yeah. As long as you put that person whose matches you using into your tree.
Diana (7m 38s):
Okay.
Nicole (7m 38s):
So it’s not hard to add people. You can just go in there and add the person in this case, I was using an uncle.
Diana (7m 45s):
So then you just select the person in the tree.
Nicole (7m 48s):
Yeah. Just like how you do it in MyHeritage when you add DNA results of a family member to MyHeritage, you choose who they are in your tree.
Diana (7m 57s):
Got it.
Nicole (7m 57s):
All right. So you might be wondering why would you need to use a network graph, especially at MyHeritage where they have this wonderful cluster creation tool, the auto cluster technology licensed from genetic affairs. And so it’s really easy. You just can click create auto cluster report, and then MyHeritage will email it to you. But the thing about that report is that you don’t have any flexibility with choosing the number of centimorgans included.
Nicole (16m 10s):
So when I generated an auto cluster report for this uncle, it just included a hundred matches and the range was 55 to 400 centimorgans. But for my research objective, to find his second great grandfather’s father, I will need to include matches that go down lower than 55 centimorgans. So I wanted to try some other method of clustering. The, MyHeritage matches that were smaller than that.
Diana (8m 48s):
Yeah. I think that the auto cluster report works really well. If you are working with a case that’s not so far back in time, you know, if you, if you have an unknown grandparent or even a no great grandparent, then hopefully you’d have some matches above that 55 centimorgans cutoff.
Diana (16m 10s):
But if you’re working like we are with cases that are early 1800s or late 1700s, and you’re working with those ranges that are like 15 to 30 centimorgans, you, you got to have more flexibility. Yeah.
Nicole (9m 23s):
Another benefit of using the network graph is the ability to see the connections between matches when align connects two nodes you know, that means they’re shared matches. But the other thing I love is that you can see connections between clusters of matches, because if you see a lot of connecting lines from one cluster of matches to another cluster of matches, you can hypothesize that those two clusters are probably related along the same family line. So maybe the most recent common ancestral, couple of one cluster is the parent and child or relative of the common ancestor of the other cluster. So it’s a great way to kind of make hypothesis that you can test. Another thing that’s great about the roots finder network crafts is that they have these four colors.
Nicole (10m 6s):
The blue is for the paternal paternal line and the green is for maternal paternal line and then red from maternal paternal line. And then maternal maternal is yellow. So you can use these for default colors, but then you can also add custom colors if you want to, for certain ancestral couples maybe that you want to focus on, or you can just give them different colors. So it’s kind of nice to be able to add matches to certain colored groups based on the common ancestral couple.
Diana (10m 35s):
Well, and that’s nice to be able to do choose your own colors, because sometimes you’re doing a Leeds chart and you have your own colors that you’ve chosen, or if you’re using the color dot systems to organize their matches. And so it’s fun that you can actually change that a little bit because at the auto cluster, you just get whatever colors, the program assigns to those clusters. You can’t change those.
Nicole (10m 58s):
Yeah. It is nice to have that flexibility to adjust the colors if you want to. Okay. So how do you get started with building your network graph? Well, first you have to do some preparation work and you have to request my heritage to send you the matches and the segment files. You can just go into your match list at my heritage and request that they send you these it’s pretty easy. There’s like three dots and you click the three dots and you click export entire DNA matches list. And then they send you an email with all the matches at MyHeritage in a zip to CSV file. And then you need to unzip that and extract all of the files.
Nicole (11m 39s):
The other thing you need to click on when you go to MyHeritage matches is the export shared DNA segment info for all DNA matches. So once you do both of those, then you’ll be ready to do additional downloading from the GEDCom client. So you’ve got those files emailed to you, then you need to have the DNA GEDCom client. And that helps you gather the triangulation data and the shared matches or in common with data because it, MyHeritage doesn’t allow you to download that from their website the same way they allow you to download the matches. So DNA GEDCom client, it costs $5 a month. Once you pay that subscription, you can use their software application called the DNA GEDCom client.
Nicole (12m 23s):
So opening up that client view, go to the gatherer screen and you can work on gathering those two things. Before I tell you more about gathering with the DNA GEDCom client I’ll just tell you a little bit about the triangulation data. So I mentioned that we need to gather the in common with shared matches and the triangulation. And so if you’re not familiar with triangulation, I’ll just go through a little bit about what that is. So MyHeritage is unique because their DNA database not only shows you the shared matches that you have with each match, but whether or not those shared matches triangulate on a particular segment segment, triangulation can be tricky to understand, but it basically means that you match a person and you also match another person.
Nicole (13m 9s):
And then those two people match each other on the same segment. So not every DNA testing company shows the fact that those other two testers match each other. Ancestry doesn’t show any segment data or triangulation at all. FamilyTreeDNA does show the segment data, but not triangulation. So for example, at FamilyTreeDNA, you can see that you match those two people, but you can’t compare them to each other, unless you have access to login and see their DNA results. Then at 23andMe, you can do limited triangulation only with those who are sharing reports with you. But this is a wonderful tool that I love at 23andMe it’s called advanced DNA comparison. And it can allow you to compare two of your matches to each other.
Nicole (13m 51s):
And then of course at GEDMatch. You can check for triangulation because GEDMatch has every tool that you could imagine for autosomal DNA. You can do one-to-one comparisons for all the people in the triangulation, and you can also use their tier one triangulation tool. So MyHeritage is special because the shared matches list there lets you know, if those other two matches also match each other by giving you that triangulation icon and the shared match list. So I think it’s the easiest site to find triangulation on. I think it’s great.
Diana (14m 24s):
Yeah, they’ve made it really user friendly and it’s fun. I’ve used that so much in looking and I also use it to paint matches on my DNA Painter chromosome map. They make it easy for you to see
Nicole (14m 35s):
I figure it out. Yeah, that’s a great point. I love DNA Painter. All right, now that you know all about triangulation, let’s get back to you downloading the triangulation and in common with data, from MyHeritage, with the DNA GEDCom client. So you opened the DNA GEDCom client application, your computer, and then what you can do to help speed up the process of gathering in common width and shared matches and stuff. You can actually load in those CSV files that MyHeritage emailed to you with the list of matches and with the segment data. So you go to the gatherer tab on the DNA GEDCom client and you select MyHeritage and then you log in with the web login and then you load the match file and chromosome file that you were emailed.
Nicole (15m 22s):
This really speeds up the process because as you know, DNA GEDCom takes a long time to download all of these things. It takes a while. Then you choose the centimorgans range.
Nicole (16m 10s):
So RootsFinder will only be able to import 20,000 matches. So if you have more than that, you don’t need to download all of them and you’ll want to settle it lower minimum threshold. The kit I was using had about 17,000 matches at MyHeritage so I could have imported them all, but I decided not to use all of those because sometimes using too many matches can make the graph messy and hard to read. And it’s also really hard for DNA GEDCom to download all of the shared match connections between those lower matches, just because there’s so many, if you keep going down to like eight, centimorgans. Yeah. So I said the lower limit to 35 centimorgans another way to help you decide what you’re centimorgans range could be, is thinking about your research objective and how many centimorgans, the matches you hope to find will share with you. Like if you’re looking for fourth cousins, you’ll want to go down a little bit lower than if you’re just looking for first and second cousins. So my auto cluster report for this tester, from MyHeritage , what remember it was only from 55 to 400 centimorgans. So I wanted to go lower and include more matches. So that’s why I went down to 35. So this was for my shared matches network graph because remember at RootsFinder with MyHeritage matches, you can do two different kinds of network graphs. So for my shared matches one, I chose 35, but for the segment triangulation network graph, I chose a smaller minimum threshold because there are fewer matches who triangulate, then there are shared matches.
Nicole (16m 58s):
So I know I could include more without it being too messy and too overwhelming. So I decided to set a minimum of 15 centimorgans.
Diana (17m 6s):
Oh, that is so interesting.
Nicole (17m 7s):
Yeah. And the idea I think with triangulation is that it’s a little bit more high quality connections because you know that they all match somewhere each other too. Yeah. Yeah. And sometimes with the shared matches, they might match each other in a different way than you match them. So it could be confusing and make your graph a little messier. Yeah.
Diana (17m 27s):
And I’m thinking this would work well for customer, our cases with a pedigree collapse where people can be related multiple ways to do some experimenting with that, because that sounds like it would be interesting. Yeah. Certainly have several cases I could work with on that to see how,
Nicole (17m 43s):
Yeah. One of our cousins who shared her DNA with me, she had a lot of pedigree collapse. So I could ask her if I could try that. Let’s see, after you choose the centimorgan range, you’re going check the box for gather in common with, ICW, which means shared matches. So what I did is I did two different gathers because if you check all the boxes at once and you do the lowest minimum threshold, it takes days, weeks, and then it gets interrupted. And so I just try to do a little bit at a time with DNAgedcom client. And so I decided that first I would download just the in common with so I could make that shared matches network graph. And then the next day I would do the triangulation network graph and download everything for that.
Nicole (18m 29s):
So for my first gather with DNAgedcom client, I just checked the box for gathering common width and chose the range 35 centimorgans and up. And this took about half a day to download everything. The thing about my heritage with DNAgedcom client is that it uses a gatekeeper delay, which slows down the process of gathering the matches. And I think this is because my heritage doesn’t want people just turning on DNAgedcom and then overwhelming their servers by having like gathering all their matches really fast. So they just have this way of making sure that people don’t abuse that I guess, and learning their website speed. That’s another reason to not set your lower limit too low. Anyway, when I did 35 and up it didn’t take too long to gather all those shared matches.
Nicole (19m 13s):
So that’s a good suggestion to start with. So then the next day I gathered the triangulation data. Before you do that, though, if you’re gathering data for the same person, the same test taker, you should take all those files that are generated by DNAgedcom and move them into a folder so that the client doesn’t overwrite those files with your new criteria for downloading matches. So I just created a folder that said like DNA tests, her name, and then gathered 35 centimorgans. So that I could remember, these are the files for 35 and up. And then I started the new gather. And this time I checked the box for gather chromosome gathering common with and gathered triangulation.
Nicole (19m 54s):
I always uncheck the box for gathered trees when I’m using RootsFinder, because they don’t support that list of ancestors that DNAgedcom client creates when you have that box checked. One thing I noticed that was interesting is that if you leave the gathering common with box unchecked and just check gathered triangulation, when you start the gathered DNAgedcom client will automatically check in common with, for you because I think they’re connected. So you have to gather the in common with, and the triangulation together. So that was interesting. You can create your segment triangulation network graph without getting the chromosome segment data. But I do recommend that you gather that because then you can see the shared segments in RootsFinder in their segment view, which is a separate view from the network graph view, but you probably will want to see that.
Nicole (20m 40s):
And when you hover over a node and the network graph a little pop-up appears with all the shared segments, if you have imported the segment data list. So I recommend that you do it. So I just let my computer run overnight by change the settings. So it wouldn’t go to sleep ever. Then it finished gathering in the morning.
Diana (20m 56s):
Those are such good tips because we do hear that a lot in our study group, people getting really frustrated with DNA GEDCom client, and the reports are running forever and ever, and never getting anywhere. So good tips.
Nicole (21m 12s):
Yeah. I always start with the higher minimum so that when you try DNA GEDCom client, for the first time, you can kind of get a feel for how it works. You can look at the reports at generated. We know if it never finishes, it might be hard. Yeah. Make sure that your computer doesn’t go to sleep. It’s okay if the monitor goes to screensaver, but if the computer goes to sleep, it will stop gathering.
Diana (21m 32s):
But once you start it again, it’s not like it re you have to redo the whole thing. One, it just start back up where it left off.
Nicole (21m 40s):
Yes, it will. So it, it has all these things saved in its database, but it doesn’t generate the reports. So you won’t know that it will keep picking up where I left off. You’ll just have to start it again and then it will quickly get up to speed.
Diana (21m 52s):
Good to know. That’s a good tip because sometimes people think they have to start over and get even more frustrated seller.
Nicole (22m 1s):
Yeah. You do kind of have to like put in your requirements again and start again, but then it will skip those matches that already gathered. Great. Okay. So now that you have the files, you need to create both of your network graphs. You can go to routes finder and start doing it. So let’s talk about the shared matches network graph first. So this one doesn’t have triangulation data. It just has all the shared matches. So you go to roots finder and you click on the DNA menu on the left, and then you’ll see a list of all of the DNA profiles that you have. And so you can upload matches for all the different people whose test kits you manage.
Nicole (22m 42s):
So you want to add a new one. So you click the plus sign and create a new profile. And then you give it a name of the person who tested you select where the matches came from my heritage. And then you select the person in your roots finder tree, whose DNA kit you are adding. And then you’re going to add their matches. So click on the choose file button. And then you’re going to go to the folder where DNA GEDCom is saving all of your reports and choose that matches file for that person. Then you import that. And then the next thing you’re going to do is import the shared matches. So when you’re looking at the list of matches, there’ll be a blue arrow at the top left.
Nicole (23m 26s):
That’s where you can select a different ways to view the DNA data. And there’s four different views. The list view, which is a list of matches. The segments view, it shows you a chromosome browser and matches on the chromosomes. And then the triangulation view, which is the network graph or cluster view. And then the circle view. So click on that triangulation one and then click choose file. Then you’ll find that in common with file that DNA GEDCom generated with all the shared matches and choose that file. Then as soon as you import that you’re instantly given a network graph, it’s as easy as that, they just put it in for you. So with this kind of network graph, with all the shared match connections going down to 35 centimorgans, it really just looks like a black blob there’s white nodes and black connecting lines.
Nicole (24m 13s):
And they’re all just together in this big orb. What I wanted to do first was add color to the graph in order to have color, you have to identify the most recent common ancestor for some of your matches. So to do that, I went over to the list view and routes binder, and clicked on some of the matches I recognized. And then you have to click on this little edit pencil on the right hand pain. And then it gives you some choices for adding notes to the match and on the match tab of that, pop-up it asks a question who does this kit match? And you can choose if it’s somebody who’s in your tree or a descendant of somebody in your tree, and then you can put in their name.
Nicole (24m 55s):
So I chose, this is a descendant of a couple in my tree, and then I just typed in their name and then roots finder pulls up those ancestors that you typed in, and then you select them. At that point. You can either choose a custom color for that ancestral couple, or it will give the default colors of blue, green, red, and yellow, depending on which grandparent line it is. One thing that’s great about this is that even if you don’t know which ancestral couple they come from, if you know which side of the family they are based on shared matches and locations and stuff, you can put there in the family line of somebody in my tree. And you can say they’re in the maternal line or they’re in the paternal line, or, you know, one of the grandparent lines.
Nicole (25m 40s):
So that’s another helpful way, even if you don’t know exactly the ancestral couple, you can just put in a hypothesis for what side of the family they’re on.
Diana (25m 50s):
Let’s say that I have got my family tree in RootsFinder. Then I want to look at my cousin, Victor Parker’s matches. Let’s say I’ve added him to my tree. You know, as my second cousin once removed. And then in the tree, I’ve also built out his lines. I wouldn’t have to like necessarily put in his tree. I could just add his lines to my tree as like collateral relatives. And then I would just select him. And then it would work with the tree information for him that I put in.
Nicole (26m 22s):
Exactly.
Diana (26m 23s):
I could just do a bare bones tree for him, like just his basic ancestors.
Nicole (26m 28s):
Yeah, I would, I would just put in like, at least his four grandparents lines so that you could use the four colors to kind of separate things out.
Diana (26m 35s):
Oh, that is so interesting. Cause I was thinking if I want to use that, I’ve got to go and upload his tree or download it to know and then put it in there. But if I could just have it all be in one big tree. So basically all my line. And then I’ve got two other cousins that I have access to their kits on MyHeritage and I could also do the same thing. So I could basically just have one tree and all these different cousins noted in the tree with their basic lines and do that. Oh my goodness. I love that
Nicole (27m 8s):
It is a great tool. I mean the ability to use your tree and your matches and a network graph and segment view, it’s pretty amazing. So RootsFinder has got it all.
Diana (27m 18s):
Wow. Now I know what I can do and I have some free time. I can just play with it.
Nicole (27m 25s):
Yeah. Yeah. The great thing about it is that it isn’t too difficult to learn how to use either. They have some great tutorials for how to do things so
Diana (27m 33s):
Well. And you’re giving us such a great tutorial because in your blog posts that goes with this, you got a lot of screenshots and a lot of explanation. And so anyone listening, if you want to try this, I would recommend you open up the blog post and fall into tutorial. And you can also listen to us talking about it while you’re trying it, if you really want to do
Nicole (27m 55s):
Well, hopefully talking about it here. Well, you know, like it gave you some ideas for what you could do and we’ll just give people some ideas for what’s possible. And then when you want to try it, you can follow the written instructions on the blog post. Yeah.
Diana (28m 11s):
I like written instructions.
Nicole (28m 13s):
Let me tell. So after spending about 20 minutes adding the common ancestral couples for several of the matches, I wanted to make sure I had some on each side, each of the four grandparent lines so that I could get all four of the colors on my network graph. So once I had those, I went back to the triangulation network graph view. It’s called triangulation and in roots binder, but I think of it as a network graph. So going back to that view, I could see the colors for several of these matches that I had added. So that was exciting. And so what happens is the match node, the little dot is colored, and then all the lines extending from that node are colored with the same color as well. So you can kind of see these splotches of color and your network graph and help you see, oh, this cluster here, these are the paternal paternal line.
Nicole (29m 1s):
Cause they’re all blue. One thing I noticed though, is that the clusters weren’t visible yet because everyone was clumped together in the middle. So at the top of the network graph, there are outward facing arrows that allow you to expand the graph and see individual clusters. So I was clicking on these, but nothing was happening. And so I realized it was because I had the test-takers brother in the network graph and he was connected to like all the matches so they couldn’t separate out. So I had to remove some of the closer matches I removed the brother and the closer cousins, like the first and second cousins. And that the way you do this, it’s super easy.
Nicole (29m 42s):
You use the filters. So at the very top of the network graph, there’s a button called filters. And when you click that, it opens a pop-up and gives you some ranges that you can select. So I lowered the maximum centimorgans to be 300 and the minimum, I changed it to be 45, just to see if I could view the clusters better. And the resulting graph after that was still a club. So I clicked that separation arrow thing at the top, and it still didn’t really help that much. So I ended up just clicking on the notes that I had added color to and dragging them out. And this separated the clumps. So you can click on each node and move them around and you can kind of manipulate the graph to be how you want it to be by just dragging the nodes around.
Nicole (30m 30s):
And when you drag one note, it drags all of the shared matches with it. So without the clusters,
Diana (30m 36s):
In your image, you got the black blob and then you’ve got red dots, green dots, blue dots. So you would just grab a blue dot, pull it out and it would pull all the blues out with it.
Nicole (30m 46s):
Yes. Yeah. And so that’s ultimately how I ended up doing it with my shared matches network graph, because like I said, it was a bit messy and cluttered and blogged together in the middle. So once I did that, I could see the clusters better. Another great way that you can filter is to select just a certain part of your fan chart to see. So clicking the filters button, then they have a fan chart with the four colors. And I wanted to see the, basically the patrilineal line. So I, I double clicked on the blue side and this selected all of the blue side going back then I just filtered to only the blue matches and their shared matches.
Nicole (31m 28s):
And then I could see a little more clearly just this one cluster that I wanted to work with and see everyone connected to the blued people. So that was very easy to use, you know, clustering to the certain side of the family that you want and filtering to that side was like, awesome. So what I would do in the future with this is go back and add in more of those people that I’ve identified in the match list, who are on that patrilineal side, then just filter to only see in blue people with their shared matches and see what kind of clusters I can see. Their
Diana (32m 2s):
That’s amazing that you can just click on what you want and the fan chart. I love that they have made this for what I can tell with the screenshots pretty intuitive and pretty.
Nicole (32m 16s):
Yeah. And it all depends on how many matches you’ve identified in the match list. You know, you have to go in and add the common ancestors. It’s super easy to do it, but if you haven’t done the work in the past, you know, to put notes in your, my heritage matches of who the common ancestor is, then it will take you a little more time, but you can use the theories of relativity if you have any of those and, you know, just look at the tree and see if there’s a common ancestor. So if you’ve done that before, it’ll be easier.
Diana (32m 47s):
Yeah. It all goes back to setting a really good foundation for your DNA in knowing who your closer matches are and knowing your ancestral lines, you just have to have a foundation to build on. And then all these tools become easier. And I love how you talked about adding notes, because that’s how we remember once we’ve done some research on a match, we don’t record it anywhere. Then we have to redo that because we won’t remember.
Nicole (33m 13s):
Yeah. Well, and the great thing about adding notes in my heritage at their match list is that in the matchless view, you can see if the notes icon is purple, meaning that you’ve added a note. So then you can just click on it right there and you can see the notes you’ve added without having to go to another page. It’s just like a little pop-up box, right on the match list. So I had that open on one screen and then I had the roots finder website open on the other screen. And I was just clicking on the notes that I had added and then putting in the common ancestor and red spider. So it went pretty quickly. Perfect.
Diana (33m 46s):
And we do talk about in our book about creating a notes protocols so that you always add the same type of information. Like I like to start with the match and then do the line back to the common ancestor. So that’s right there in my notes, basically it’s a little mini family tree on that line, just really simple in the notes. And so those types of things can really be helpful.
Nicole (34m 9s):
Yeah. And if you’ve been using air table to track your matches and you’ve been tracking a lot of your, my heritage matches there, you could just open up that and you know, you’d already have the, the ancestral couple there. So either way. Yeah. All right. So that was the shared matches network graph for MyHeritage. Now let’s talk about the segment triangulation network graph. Now this is the special, you know, unique feature of MyHeritage. And I think this is kind of the way that RootsFinder designed these triangulation network graphs to work with, to work with this triangulation data from GEDMatch and MyHeritage.
Nicole (34m 51s):
So I was excited to try it and see what it, how it worked. So remember that this triangulation data is more specific. It’s a subset of the shared matches. So it will include less connections and hopefully it won’t be as messy. So to create your segment triangulation network graph, you have to create a new separate DNA profile for that same tester in RootsFinder, because you can’t mix the two types of network graphs, there’s only one network graph for each profile. So just go back to where it’s finder, click DNA on the menu, click the plus sign to create a new DNA profile and then type the name of your DNA tester. And then just, you have to have like a little bit of a unique name for each profile.
Nicole (35m 32s):
So I just added the word triangulation to the end of their name. So I would remember that this is the profile that I’m doing, the triangulation network graph instead of the shared matches network graph. Then after you create the profile, you import the matches. And for me, I did a separate gather, remember with DNAgedcom client, because I wanted to include more matches. So I went down to 15 centimorgans and the gather, but when I opened up the matches file, I noticed that the triangulation and the matches file have only included matches down to 27 centimorgans. So somehow my DNAgedcom gather, got interrupted and generated the reports right there at 27. And didn’t go all the way down to 15.
Nicole (36m 14s):
So that was fine. I just went with it. And so I imported all the matches from 27 up, and this was a total of 1,207 matches. So I started DNA GEDCom client, again, gathering down to 15, but I just made my network graph with this data that I already had. So then after you load the matches file that DNA GEDCom created for you, he will see the list of matches. And then next you go to that triangulation network graph view by clicking that arrow down and selecting the triangulation icon, then you choose the file and you upload the triangulation file generated by DNA GEDCom, not the shared matches. So then after you upload that triangulation file, you will instantly see a network graph of matches who have segment triangulation.
Nicole (37m 2s):
They share the same segment of DNA with you and another match. So the person who you share with us, the node, and then the connecting line goes to the other person and the triangulation and this kind of works out. So you can see clusters of people who are triangulate, and they don’t always all triangulate on the same segment in that cluster, but everyone in that cluster triangulates with you, the node and the line connecting to another person. So they share the same segment of DNA with you in another match anyways. So what was really great was that I saw all the colors that I had given to these same DNA matches and the other profile they carried through to this profile as well. So I didn’t have to go back and do all the work again to add the common ancestors.
Nicole (37m 47s):
So RootsFinder just knew that these were the same people, which was glorious saying, oh, I can clearly see the blue clusters that I was interested in related to that patrilineal line. And so it was really fun. So then I could just jump right in and start playing with the filters. So what I did with the filters is I noticed that if I filtered out matches less than 35 centimorgans roots finders, that there were no matches to display and the network graph triangulation view. And it was very confusing at first because the filter pop-up box was saying that there were 456 matches from 35 to 593 centimorgans, but apparently none of them triangulated with the other people in that range. So I thought that was really fascinating. Then when I lowered the range, centimorgan to 34 centimorgans, there were a few more matches.
Nicole (38m 34s):
There were 510 now, and the network graph able to be generated. And it was kind of a small graph. Didn’t have that many connections, but I just thought that was so interesting. And that’s because there’s just, there were no triangulations from 35 to 5 93, but then once you lower it, one more set and we’re Oregon down, there were triangulations. So even though there were 456 matches, none of them triangulated with each other in that range. So anyways, you have to go down a little bit lower, including lower numbers of shared centimorgans.
Diana (39m 13s):
Well, that just means that you’ve got to really experiment with the filtering. Do you recommend like maybe keeping track of this in air table? It seems to me like, it’d be something good for the DNA research log. If you’re working on this in a project and not just experimenting, you know, you’d say, well, at 35, there were none went to 34, you know, just so you can track what you’ve been doing. Cause sometimes we play around with these tools and then we don’t record the data anywhere and we forget,
Nicole (39m 38s):
Yeah, I like to record it. And you know, when I write the blog posts, that kind of is where I’m recording it, but you should definitely put it in air table or some kind of notes feature just to help you remember what you’ve done and what you learned. Right.
Diana (39m 52s):
Right.
Nicole (39m 52s):
The one thing that was interesting is it didn’t tell me how many matches triangulated. It just tells me the total number of matches in that total shared centimorgan range. So when I did the range of 34 to 593 centimorgans, there were 510 matches, but there were not 510 nodes because not all of those people were triangulating with someone in that range. So what I decided to do was select all of those matches. And when you hold down, shift on your keyboard and drag your mouse over the network graph, you can select all the matches in the graph. And then all the list of them are shown in the pane on the right of roots finder. So I copied and pasted these names into a spreadsheet to count them.
Nicole (40m 35s):
And there were only 188. So for that range of total shared centimorgans of 34 to 593, only 188 of those triangulated with each other. And then from 35 and up none of them triangulated. So isn’t that fascinating? Yeah. Anyway, if you click on a node in the graph, it will not show the segment data and the shared segments, unless you’ve already imported that into RootsFinder. So the next step is to import the segment data. So to do this, you just go to the top, arrow down and choose the second icon, which is for segments. It’s like a chromosome browser image and then click the choose file button and select the chromosome CSV file that DNA GEDCom client generated.
Nicole (41m 19s):
So after you do that, you will see a chromosome browser with numbered. Autosomes one through 22 and the X chromosome, but MyHeritage doesn’t have X chromosome matches. So you won’t see that with MyHeritage data, but now that you’ve added the segment data and the triangulation network graph view, when you click on a match, you’ll see a pop-up list of all the shared segments. So that was kind of fun to be able to see those. And I tried a new range of 31 to 593 centimorgans, and I zoomed out on my browser window so that I could see the whole graph. But then I use the RootsFinder, zoom button to zoom a little bit more in, and this made the notes smaller with, to kind of light. And the graph had a little bit of a different look.
Nicole (42m 1s):
So you can experiment with those zoom button zooming in with your internet browser or zooming out, and then using the RootsFinder zoom as well.
Diana (42m 12s):
Well, it looks like you had a lot of fun playing with this and experimenting, and I’m so glad you did, because now I’m motivated to go try this out with my Cynthia Dillard project and working with my cousin matches, I’ve got three cousins and my own DNA, and I’d had some other shared matches that have also shared their DNA with me. That makes me want to just get it all in here and, and make these graphs for everybody.
Nicole (42m 38s):
Yeah. I mean, it, ideally you could cluster all of the matches of each of the people you’ve tested so that you can quickly find the DNA matches who are relevant to your research objective. And ultimately that’s why we do clustering is to find groups of matches and figure out how they’re related to each other. And hopefully that gives us clues and hints that help us with our research.
Diana (43m 0s):
Oh yeah. What a great way to look at your DNA in another way and let you manipulate the data so that it gets it just exactly how you want it. I love this. Everybody’s going to have to go try out roots finder, what a great tool. Okay.
Nicole (43m 17s):
All right. Well, thanks for listening. I hope you guys all try it out and let us know in the comments. If you do good
Diana (43m 26s):
Luck, have a great week. Everyone Bye-bye
Nicole (43m 28s):
bye-bye Thank you for listening. We hope that something you heard today will help you make progress in your research. If you want to learn more, purchase our book Research Like a Pro a Genealogist Guide on Amazon.com and other booksellers. You can also register for our Research Like a Pro online course or join our next Study Group. Learn more at FamilyLocket.com to share your progress and ask questions. Join our private Facebook group by sending us your book receipt or joining our e-course or Study Group. If you like what you heard and would like to support this podcast, please subscribe, rate, and review. We hope you’ll start now to Research Like a Pro.
Links
How to Make a RootsFinder Triangulation Network Graph with MyHeritage DNA Matches – https://familylocket.com/how-to-make-a-rootsfinder-triangulation-network-graph-with-myheritage-dna-matches/
RLP 180: RootsFinder Network Graphs – using AncestryDNA matches – https://familylocket.com/rlp-180-rootsfinder-network-graphs/
RootsFinder – https://www.rootsfinder.com/home
Research Like a Pro Resources
Research Like a Pro: A Genealogist’s Guide book by Diana Elder with Nicole Dyer on Amazon.com – https://amzn.to/2x0ku3d
Research Like a Pro eCourse – independent study course – https://familylocket.com/product/research-like-a-pro-e-course/
RLP Study Group – upcoming group and email notification list – https://familylocket.com/services/research-like-a-pro-study-group/
Research Like a Pro with DNA Resources
Research Like a Pro with DNA: A Genealogist’s Guide to Finding and Confirming Ancestors with DNA Evidence book by Diana Elder, Nicole Dyer, and Robin Wirthlin – https://amzn.to/3gn0hKx
Research Like a Pro with DNA eCourse – independent study course – https://familylocket.com/product/research-like-a-pro-with-dna-ecourse/
RLP with DNA Study Group – upcoming group and email notification list – https://familylocket.com/services/research-like-a-pro-with-dna-study-group/
Thank you
Thanks for listening! We hope that you will share your thoughts about our podcast and help us out by doing the following:
Share an honest review on iTunes or Stitcher. You can easily write a review with Stitcher, without creating an account. Just scroll to the bottom of the page and click “write a review.” You simply provide a nickname and an email address that will not be published. We value your feedback and your ratings really help this podcast reach others. If you leave a review, we will read it on the podcast and answer any questions that you bring up in your review. Thank you!
Leave a comment in the comment or question in the comment section below.
Share the episode on Twitter, Facebook, or Pinterest.
Subscribe on iTunes, Stitcher, Google Play, or your favorite podcast app.
Sign up for our newsletter to receive notifications of new episodes – https://familylocket.com/sign-up/
Check out this list of genealogy podcasts from Feedspot: Top 20 Genealogy Podcasts – https://blog.feedspot.com/genealogy_podcasts/


Leave a Reply
Thanks for the note!