
Welcome to the first of three blog posts about our upcoming Merging and Separating Identities course. The course addresses one of genealogy’s toughest challenges, distinguishing between same-named individuals, and today’s post covers the most essential technique taught in it.
One Technique That Brings Order to Your Merging and Separating Cases
If you’ve ever stared at a mountain of records for multiple same-named individuals and felt completely overwhelmed, you’re not alone. One of the most common challenges genealogists face is knowing how to organize dozens, sometimes hundreds, of records when trying to merge or separate identities. A well-designed spreadsheet makes this work manageable.
Why Spreadsheets Are Non-Negotiable
When you’re dealing with a merging and separating (M/S) case, you’re trying to solve a complex puzzle. You might have many records for “John Smith” in the same county during the same time period, and you need to figure out which records belong to which person. Without a systematic way to organize and analyze this information, you’ll find yourself redoing work, missing critical details, and losing track of your rationale.
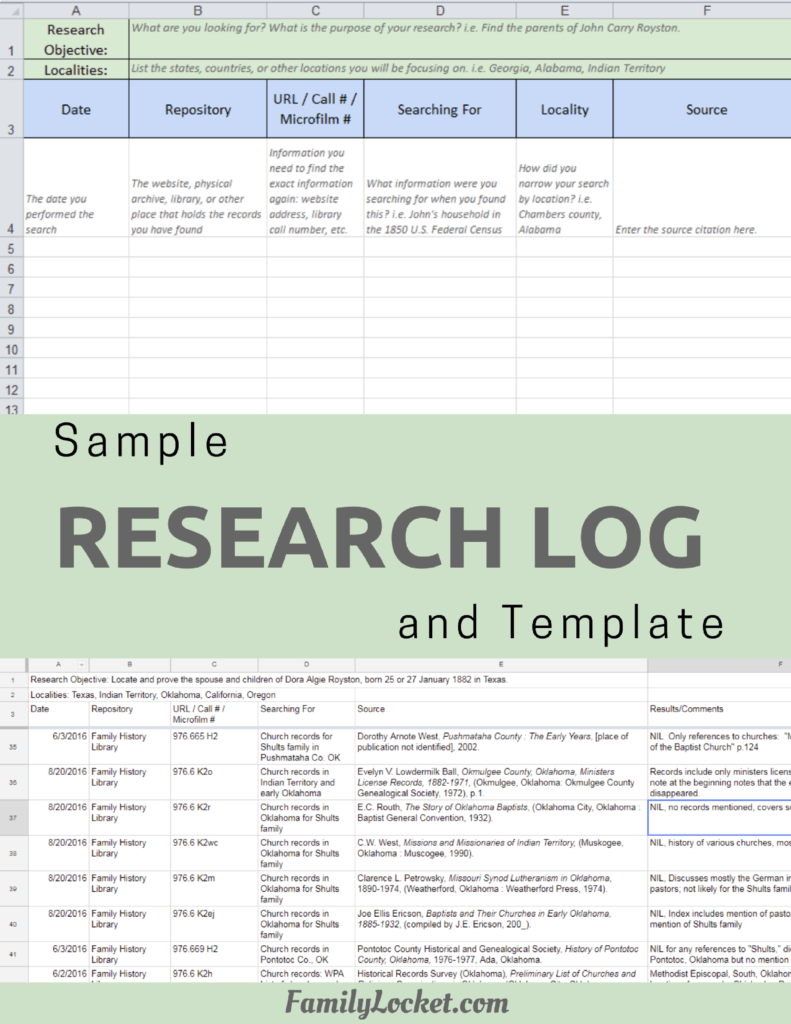
For M/S cases, a spreadsheet is a must. Unless you’re dealing with a very simple case, and those are rare, you need a spreadsheet to manage large quantities of information efficiently. Excel, Google Sheets, and AirTable all work; use whichever suits you. What matters is that you can easily add or change rows and columns as your case evolves.
The Three-Section Framework
An effective M/S spreadsheet has three distinct sections.
1. The Source Section (typically highlighted in one color)
This section captures everything about where the information came from:
- Record type (census, deed, probate, etc.)
- Event date and recording date (use month numbers, not names, for easier sorting)
- Event location at the time and present-day location name
- Active hyperlinks to online records and links to offline files on your computer
- A reference number assigned to each record
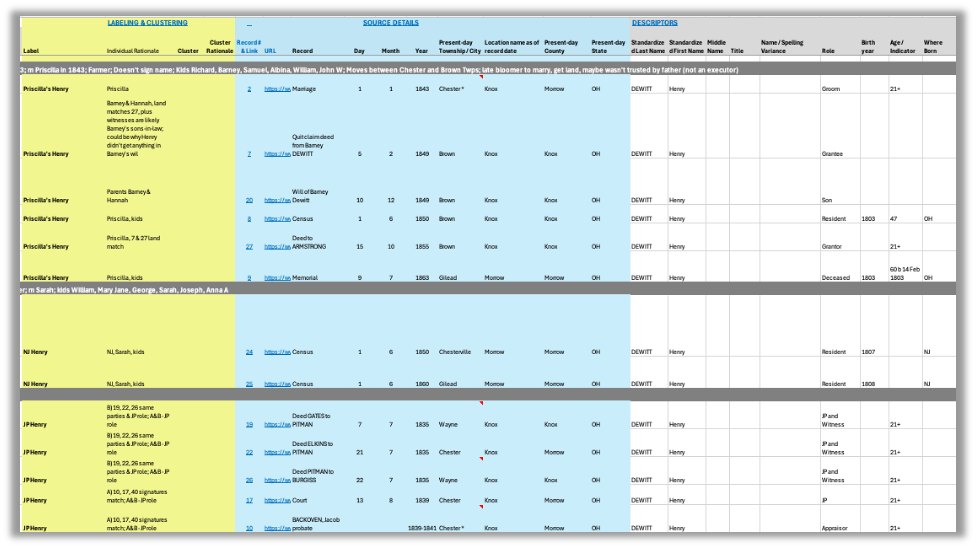
Excel image courtesy of Jan Joyce, Course Coordinator
2. The Descriptors Section (the largest section)
Create columns for every possible descriptor:
- Names (including variations, middle names, initials, prefixes, suffixes)
- Ages and birth years
- Spouse names and children’s names
- Occupations
- Property descriptions and locations
- Signatures or marks (literacy indicators)
- Associates and witnesses (FAM & FAN Club members)
- Religious affiliations, ethnicities, migration patterns
Start with our comprehensive template and adapt it as needed. If it seems overwhelming at first, hide the columns you don’t need and add new ones as patterns emerge.
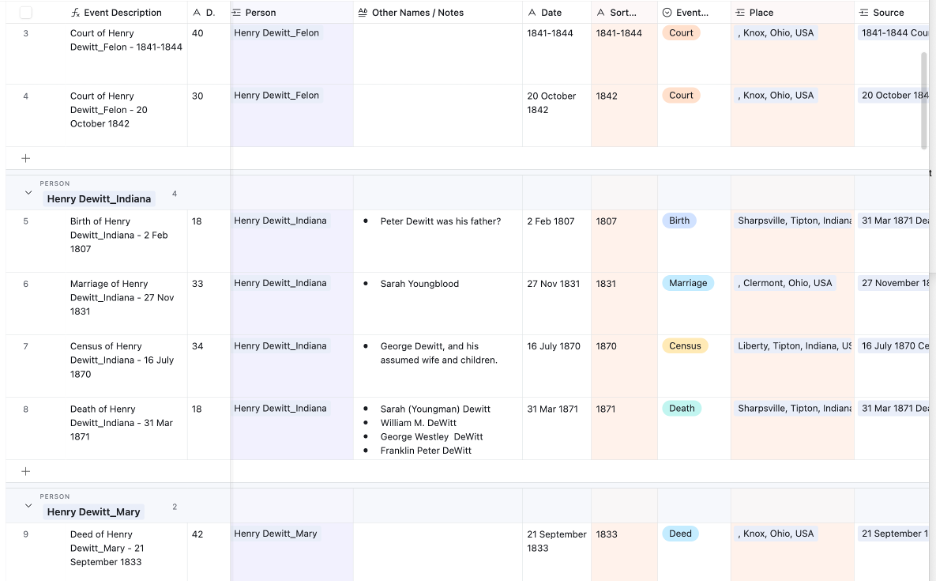
AirTable image courtesy of Linda Rogers, 2025 course student
3. The Labeling & Clustering Section
This section is where you begin to separate individuals and record your reasoning:
- Labels for each emerging identity (like “Maryland Henry” or “Late Bloomer Henry”)
- Individual rationale (WHY you grouped certain records together)
- Cluster groupings (for FAM and FAN Club members)
- Action items (records to seek, correlations to make, questions to answer)
The Power of Granular Detail
Create columns with granular detail, one piece of information per column. This may seem tedious at first, but it makes analysis possible. Instead of entering “John Smith, age 34, farmer, married to Mary” in one cell, separate these into individual columns. You can then sort by age across all records, filter by occupation, or group by spouse name, and find patterns you would otherwise miss.
From Gathering to Grouping: The Process
The workflow has four steps.
Step 1: Gather Everything First
Don’t start analyzing while you’re still collecting. Gather all sources first, including negative searches and negative findings. These “no results” are often as valuable as the records you find.
Step 2: Squeeze Every Descriptor
Go through each source and extract every possible descriptor. Read word by word, line by line. Note who witnessed the document. Note details of property descriptions that seem minor. Hypothesize or infer descriptors when possible based on legal implications (age of majority, for example).
Step 3: Sort Repeatedly by Different Descriptors
Sort your records by each descriptor, one at a time, then in combinations. Sort by wife’s name to see which records group together. Sort by location to see geographic patterns. Sort by date to create a timeline. Each sort produces different possible groupings.
Step 4: Label and Provide Rationale
As identities emerge from your sorting, label them. Use descriptive labels that make sense to you, such as “42-Acre Henry,” “Litigious John,” or “Clara’s Husband.” Color-code the rows by identity. Always document your rationale. Why did you group these records together? What evidence supports the grouping?
The Features That Save Hours
Take advantage of spreadsheet features that make M/S work efficient:
- Freeze panes so headers stay visible while scrolling through hundreds of rows
- Hide columns when there’s too much information to scan at once
- Split screen to compare two potential identities side by side
- Cell comments to add analysis, confidence levels, or questions
- Hyperlinks to jump directly to sources or reference materials
- Version management to save snapshots when you make major grouping decisions
Real Results from Real Students
We tested these organizing methods with students working on a common data set of multiple Henry Dewitts in 1820s Ohio. Students used Excel, Google Sheets, and AirTable, and those who applied the systematic spreadsheet approach made the most progress. For the course, they labeled and separated four different Henrys, color-coded their groupings, documented their rationale, and identified what additional research was needed. In their own work, many students said they would not have seen critical patterns without the ability to sort and filter the data.
The Bottom Line
Less narrative, more categorization. Keep spreadsheet entries concise and focused so you can sort, filter, and see connections across records.
Keep all your notes and rationale in the spreadsheet so it is your single source of truth for the case. When you’re stuck, return to the spreadsheet and sort by a descriptor you haven’t focused on yet.
Organizing data effectively is the foundation of successful merging and separating work. It is the difference between drowning in records and confidently identifying which John Smith is yours.
Learn more and register here: https://familylocket.com/product/merging-and-separating-identities/











Leave a Reply
Thanks for the note!