
If you have an ancestor who is still a mystery despite years of research, you’ll relate to my Cynthia (Dillard) Royston project. I am currently working on phase 5 as part of the Research Like a Pro with DNA study group. Each phase has focused on a specific objective and has eliminated many Dillard candidates. Eventually, I hope to have one man left standing, whom documentary and DNA evidence point to as Cynthia’s father. In part four of this series on my research, I’ll share how I logged the research and share my tips for creating source citations quickly and efficiently.
Here is the full series:
Finding a Father for Cynthia: Phase 5 – Part 1 Research Objective
Finding a Father for Cynthia: Phase 5 – Part 2: Timeline and Locality Research
Finding a Father for Cynthia: Phase 5 – Part 3: Research Planning
Finding a Father for Cynthia: Phase 5 – Part 4: Research Log and Source Citations
Finding a Father for Cynthia: Phase 5 – Part 5: Report Writing – Analysis & Correlation
Airtable Research Log
Airtable has been my go-to research log for many years now – ever since Nicole created the first template and posted it on Airtable Universe. Each year, she has updated the template with more functionality. This year was no exception, so even though I had several research logs from past projects on Cynthia Dillard – some in Google Sheets – I wanted a fresh start with the new template, titled RLP with DNA 4.2 (2026).
Two versions are available. One is prefilled with sample data that you can delete once you understand how to enter your project information. The other is blank and ready to use. We recommend always starting with the DNA research log and simply ignoring the DNA tables until you want to add DNA to a project. Airtable makes it simple to move tables to the end of the list if desired.
In the screenshot below, you can see some of the tables I’m using in my Airtable Base. Because this is a DNA project, I’ve used those portions of the base to enter data about key DNA matches for the project.

Some of the tables in the Airtable base
Research Logging Process
Once I have a solid research plan, it’s simple to sit down at my computer, open my Airtable base, and start logging the searches. My process is to fill out the log record as I research. You can view and enter data either in the row view, or you can open up the record and see it in a form view to fill out. Although I generally use the row view, having the form option is nice since it opens up larger on your screen.
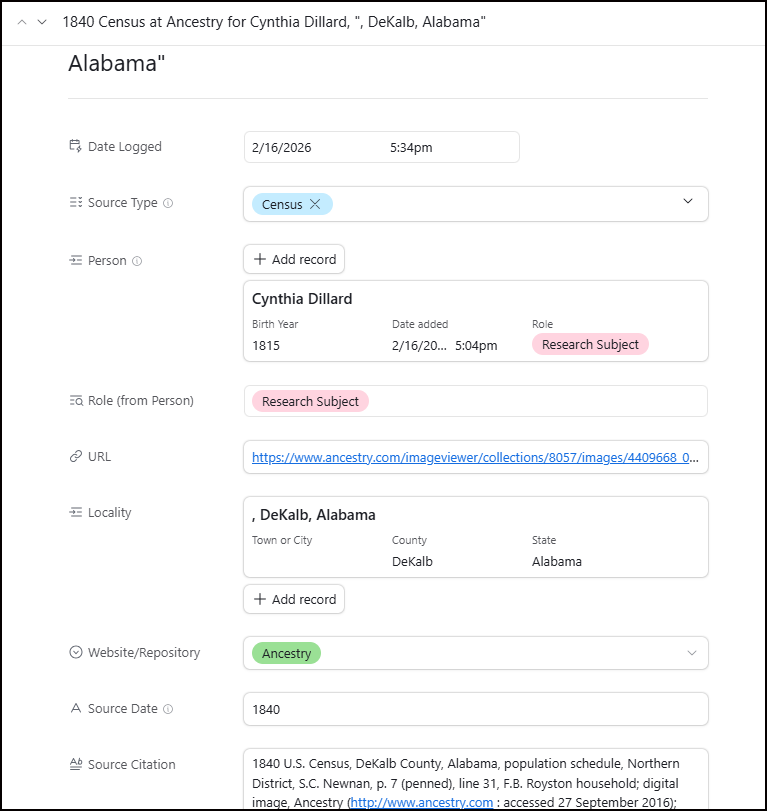
Form view of the record
Once the various fields are filled out, you can easily sort and group by any of them. This was very useful for the Dillard project because I was researching three candidates for Cynthia’s father: James, Joseph, and Tolliver Dillard. I kept the research log grouped by person and sorted it chronologically so my records for each man formed a timeline for each. You can also adjust the row height from short to extra tall. Sometimes I want to see the big picture of the research and use the short view; other times, I want to see more detail at a glance.
My first step of the research was to review online family trees for each man, and those didn’t have associated dates, so when sorted, they appear at the top of the list so I can easily see them. I could also group by locality, source, or website/repository.
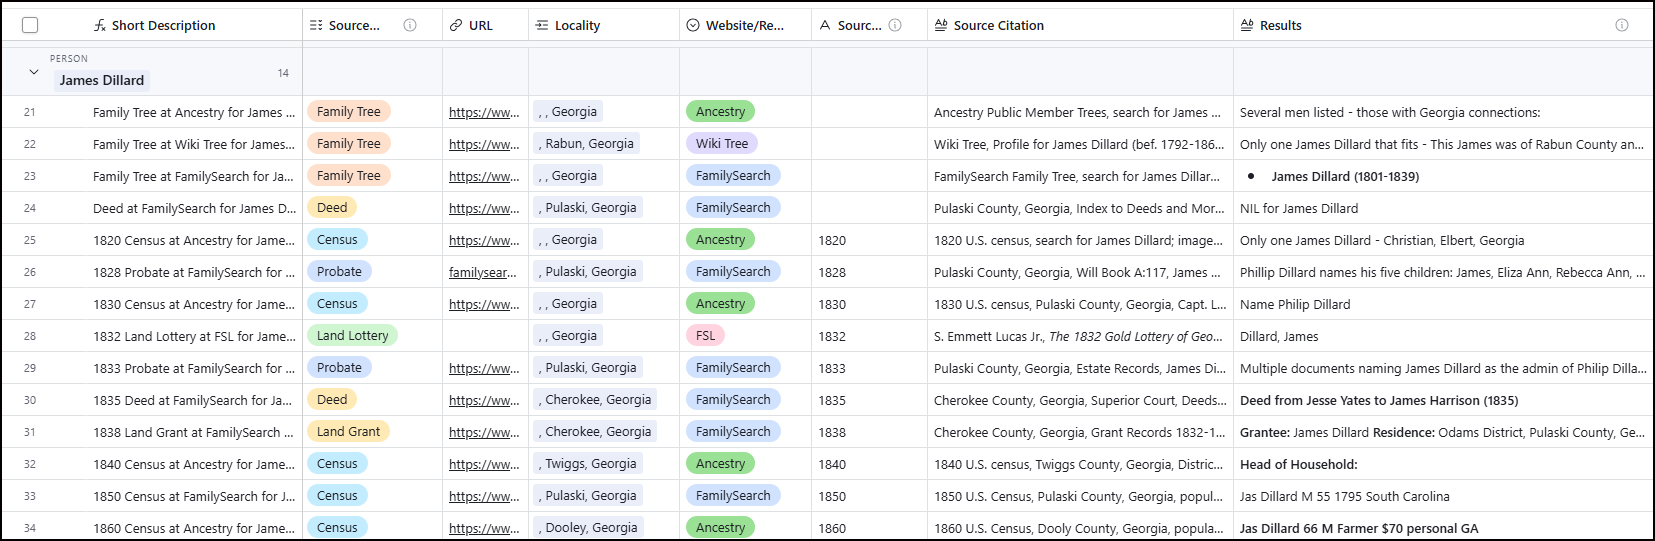
James Dillard portion of the research log
Source Citations
Creating the source citation the first time you view the source ensures two things: one, that you truly understand the source, and two, that you capture all the information to properly identify the source and return to it in the future. This can sound intimidating, especially with FamilySearch images, so here is my method for quickly accomplishing this. We’ll use the deed below to illustrate. This is a layered citation, so we’ll break it down into the digital and physical layers.
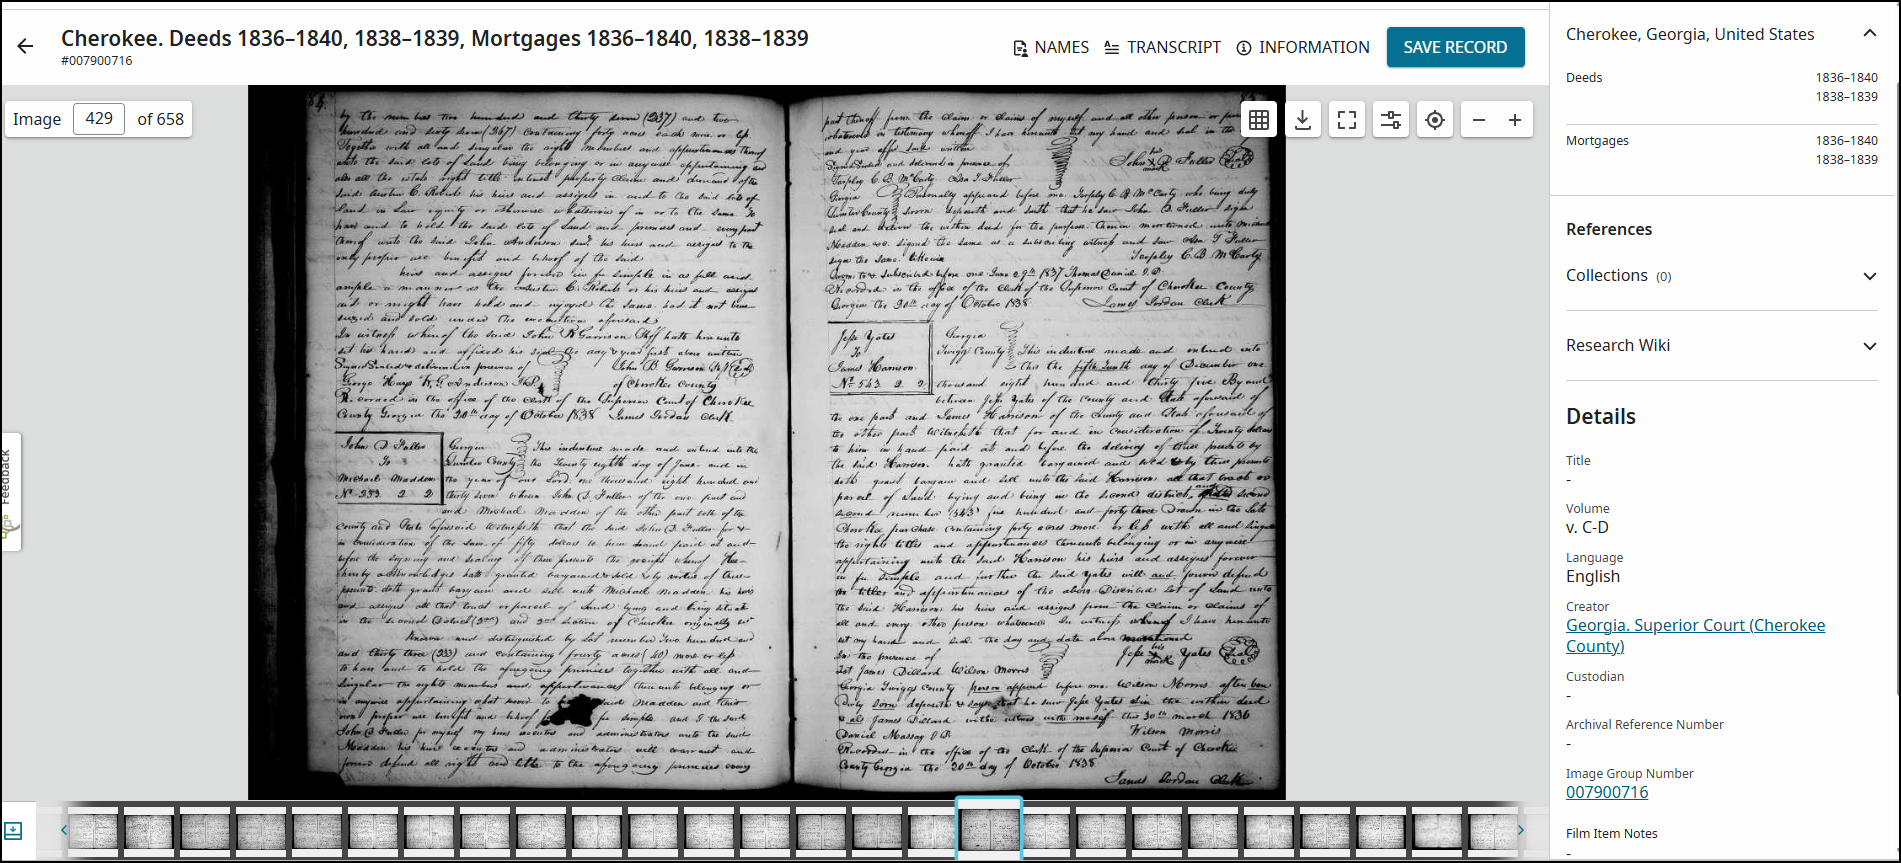
Cherokee County, Georgia, Superior Court, Deeds D:85, James Dillard of Twiggs County, witness to deed, Yates to Harrison, 1836; imaged, FamilySearch (https://www.familysearch.org/ark:/61903/3:1:3Q9M-CS4R-SSQP-N : accessed 6 June 2026), IGN 7900716, image 429 of 658.
Digital Layer
1. Start the citation with the digital layer, then when it’s completed, fill in the information for the physical layer. I use the semicolon to separate layers, so I type that first, followed by imaged, FamilySearch (url : accessed date). Note that I cut off the URL before the question mark to shorten the citation URL.
; imaged, FamilySearch (https://www.familysearch.org/ark:/61903/3:1:3Q9M-CS4R-SSQP-N : accessed 6 June 2026)
2. The FamilySearch webpage generally opens to the transcript page. To find the image group number, click “Information” at the top of the page. That opens up more information about the source. In this case, we learn that the Image Group Number (IGN) is 7900716. I record that information in my citation, along with the image number, which completes the digital layer.
IGN 7900716, image 429 of 658.
Physical Layer
1. With the digital layer created, I can now examine the record carefully and easily return to the page in question. The goal here is to understand the source clearly, and to do that, you need to go to the beginning of the images to find out more. In the citation for this deed, the FamilySearch collection is titled “Cherokee. Deeds 1836–1840, 1838–1839, Mortgages 1836–1840, 1838–1839.” This is not descriptive enough of the specific deed, so I browse the images for the beginning of the deed book. I click the grid box to open the multiple-image view and scroll up to find that this particular deed is from Book D. This collection holds many deed and mortgage books, so I wanted to ensure I cited the correct one.
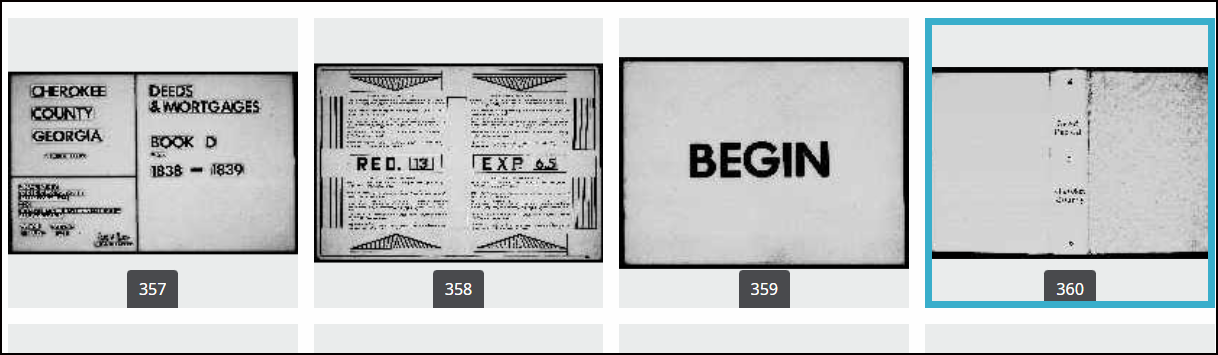
Beginning images of deed book D
2. Once you understand what type of source you’re using, you can record the details such as the creator of the record and volume and page number.
Cherokee County, Georgia, Superior Court, Deeds D:85
3. Finish the physical layer with the specific details about the people involved and the date.
James Dillard of Twiggs County, witness to deed, Yates to Harrison, 1836
That’s it! The finished citation reads:
Cherokee County, Georgia, Superior Court, Deeds D:85, James Dillard of Twiggs County, witness to deed, Yates to Harrison, 1836; imaged, FamilySearch (https://www.familysearch.org/ark:/61903/3:1:3Q9M-CS4R-SSQP-N : accessed 6 June 2026), IGN 7900716, image 429 of 658.
I used this formula to quickly create all the FamilySearch citations for records such as deeds, probate, court, and tax records.
What did I discover after following my research plan and logging 59 research entries in the research log? I’ll reveal the findings in the next post when we look at writing the report and correlating and analyzing the records.
Best of luck in all your genealogical research!











Leave a Reply
Thanks for the note!